Wednesday, March 26, 2014

A Bounce-A-Rama Party

Hello everyone,

    It's been awhile since I've posted parties or anything at all! Wheew. A quick update about what I have been up to for the past year: I passed my LVN NCLEX exam then worked, worked, worked. Hehe. Okay so Dasha is now almost four and we've been busy with preschool, ballet classes and trips.

    Enough of me now, the post I'm about to share is about Dasha's 3rd birthday party that was held last May 2013 at Bounce-A-Rama in Milpitas, CA.

    A few tips about throwing a Bounce-A-Rama party:

  • If you can do your party on a weekday, do so because it gets really busy on the weekends though we did ours on a Saturday afternoon which came out not so bad 'cause people prefer the outdoors in Spring.
  • Pick the party room that's located upstairs it has an extra table for buffet style settings for your food.
  • You can bring your own cake and store it hours before the party which I think is really nice.
  • They do stick with the 2-hour period policy for your party so if you know your guests too well and know that most of them come in late (like just ours) adjust the time on your invitation for at least half an hour before the party starts. They can wait in the game room and would not be bored. Hehehe.
  • In terms of food, they serve a pretty decent quality and quantity of your ordered food but I suggest that order just enough at the time of booking and then just add more on the party itself when you actually know how many guests you have on your party.
    To sum it all up, we had fun and it was a very stress-free party 'cause after the party's done all we had to do was pack up the gifts and go home! :)

    Here are a few pictures from Dasha's Barbie Bounce-A-Rama party:


Thank you for reading! God bless you!

'Til my next post,

Diorelle 


Sunday, July 15, 2012

Luau Party

Hello hello! Isn't this the best time of the year to have a Luau party - in an almost-perfect weather season? Our church had one and here's what I did for a Potluck Luau Party for our Pastor who celebrated his birthday yesterday and it was really such an honor for me to do this.

The challenge : $50 budget for decorations.

When I think of Luau, first thing that popped out of my head is COLORS. Luau colors signifies something:

  • Blue - waves of the sea
  • Green - for the beautiful trees
  • Yellow - for the amazing sun
  • Orange - sunset, who does not love the color of sunset?
  • Pink / Purple - for the pretty flowers

I've always wanted to do balloon centerpieces but I can't find the plastic dowels specifically made for balloons. They have it online but shipping and handling is way more expensive than the dowels itself so I had to think another way of doing it = BALLOON TWISTING! Yay because this is the FIRST TIME I did balloon twisting and I ended up sleeping around 5AM. Hihihi :)

So I made different types of balloon centerpieces and taped them in the colorful beachcomber hats we had.

Flowers (the food table at the background had grass skirts as design).

 Palm trees


This balloon tree wasn't this thin, the other yellow one popped.


Flower head

My buffet centerpiece is a Palm tree made of pineapple and fronds.


 Luau wouldn't be a Luau without Tiki torches and leis.


My husband hanging Leis on the trees (I'm so happy that he has been active at church lately and my entire family too).


That was pretty much it and I hope I do another church event. This was also my first Luau party and I know there's still so much more decorations I could've incorporated to this but still I had so much fun doing it and anything for the Lord is priceless = just such an amazing and fulfilling feeling. Thank you so much again Cathedral of Faith - Milpitas for entrusting me with this.

God bless us all and happy Birthday Pastor Robert! :)

Please click HERE to like our Facebook page.

THANK YOU AND TO GOD BE THE GLORY! :)

Tuesday, June 26, 2012

Mickey Mouse Oreo Pops

Hello everyone. I would like to share how I did the oreo pops I made for my daughter's 2nd bday.


Here's what you'll need:

  • Double stuf oreo (do not use the regular oreos)
  • Popsicle/lollipop sticks
  • Chocolate candy melts
  • Mini oreos (for the ears)
Here's what you'll need to do:
  • Heat the candy melts in the microwave (you would want to add a tsp or two of vegetable oil).
  • Dip the popsicle stick into the melted candy melts.
  • Open the Double Stuf Oreos and insert the stick (just like what you see in the picture).

  • Next, seperate the mini oreos and remove the filling.
  • Dip half of the mini oreos in the melted chocolate and place them on each side of the double stuf oreo to make the ears.
  • Line them together and freeze for about 10-20min.


  • Remove from the freezer and coat them with the left over melted chocolate.
  • Then decorate. I didn't have much time to decorate the oreos so it ended up being a silhouette Mickey Mouse Oreo Pops.


  • My husband made the stand with an old but sturdy box and wrapped it with white paper and stuffed the inside with more paper to give weight on it. He put a slit as wide as the end of the popsickle stick.
  • Minnie Mouse wand/decor - I'll blog about it later.


My number 1 customer!!! :)
Thank you for reading :)

God bless and have a wonderful day ahead of you :)

1 Chronicles 4:10 - The prayer of Jabez

Jabez cried out to the God of Israel, “Oh, that you would bless me and enlarge my territory! Let your hand be with me, and keep me from harm so that I will be free from pain.” And God granted his request.

Monday, June 25, 2012

Ultimate Nachos

My husband and I love nachos except when we're outside and they give you just a squeeze or two of cheese. So why not make our own nachos at home with unlimited cheese, right?


Unfortunately, I did not use any measurements when I made this.

What I used:
  • For the beef:
    • Ground beef
    • Salt and pepper
    • Paprika
    • Onion
    • Garlic powder
    • 2 cups boiling water
  • For the cheese:
    • 3 tbsp butter
    • 3 tbsp flour
    • 2 cups cold milk or evaporated milk
    • 1 tsp salt
    • 3 - 4 oz of sharp cheddar cheese (I always use Velveeta)
  • Nachos
  • Parsley (for garnish)
  • Tomatoes
  • Iceberg lettuce
  • Sour cream
How I did it:


  • For the beef:

    • Boil 2 cups water then add the ground beef, salt, pepper and onion.
    • Wait until water evaporates and the beef's oil comes out naturally (make sure not to burn it). I boil the beef to make sure it is fully cooked plus it wont be oily because you didn't use oil (learned this from my mother).
    • Add the remaining ingredients and set aside.

  • For the cheese:

    • In a medium sauce pan, heat the butter on medium heat then add the flour and whisk together until it turns yellow.
    • Add the cold milk or evaporated milk and stir constantly. Bring to a boil.
    • Make sure you keeps stirring so it wont burn.
    • Add the salt and wait for proper texture to arise.
    • Add the cheese now and stir until it melts. Set aside.

  • Now put them all together in a serving platter:


  • That's it. I hope you'll enjoy making and eating this as much as we did! :)

    Thank you for reading and God bless :)

    Friday, June 22, 2012

    Pink and White Minnie Mouse Themed Party

    My daughter celebrated her 2nd birthday last May 5, 2012 with a Pink and White Minnie Mouse theme. At first, I wanted a Princess theme but then I thought that it wasn't age appropriate yet. So I went with Minnie Mouse.

    I planned and made almost everything myself since it was held at our house and I could put all the decorations that I possibly can.

    We had different kinds of desserts, food, bounce house and entertainment - Minnie Mouse and a Gentle Clown celebrated with us.

    *Homemade means *I made :)

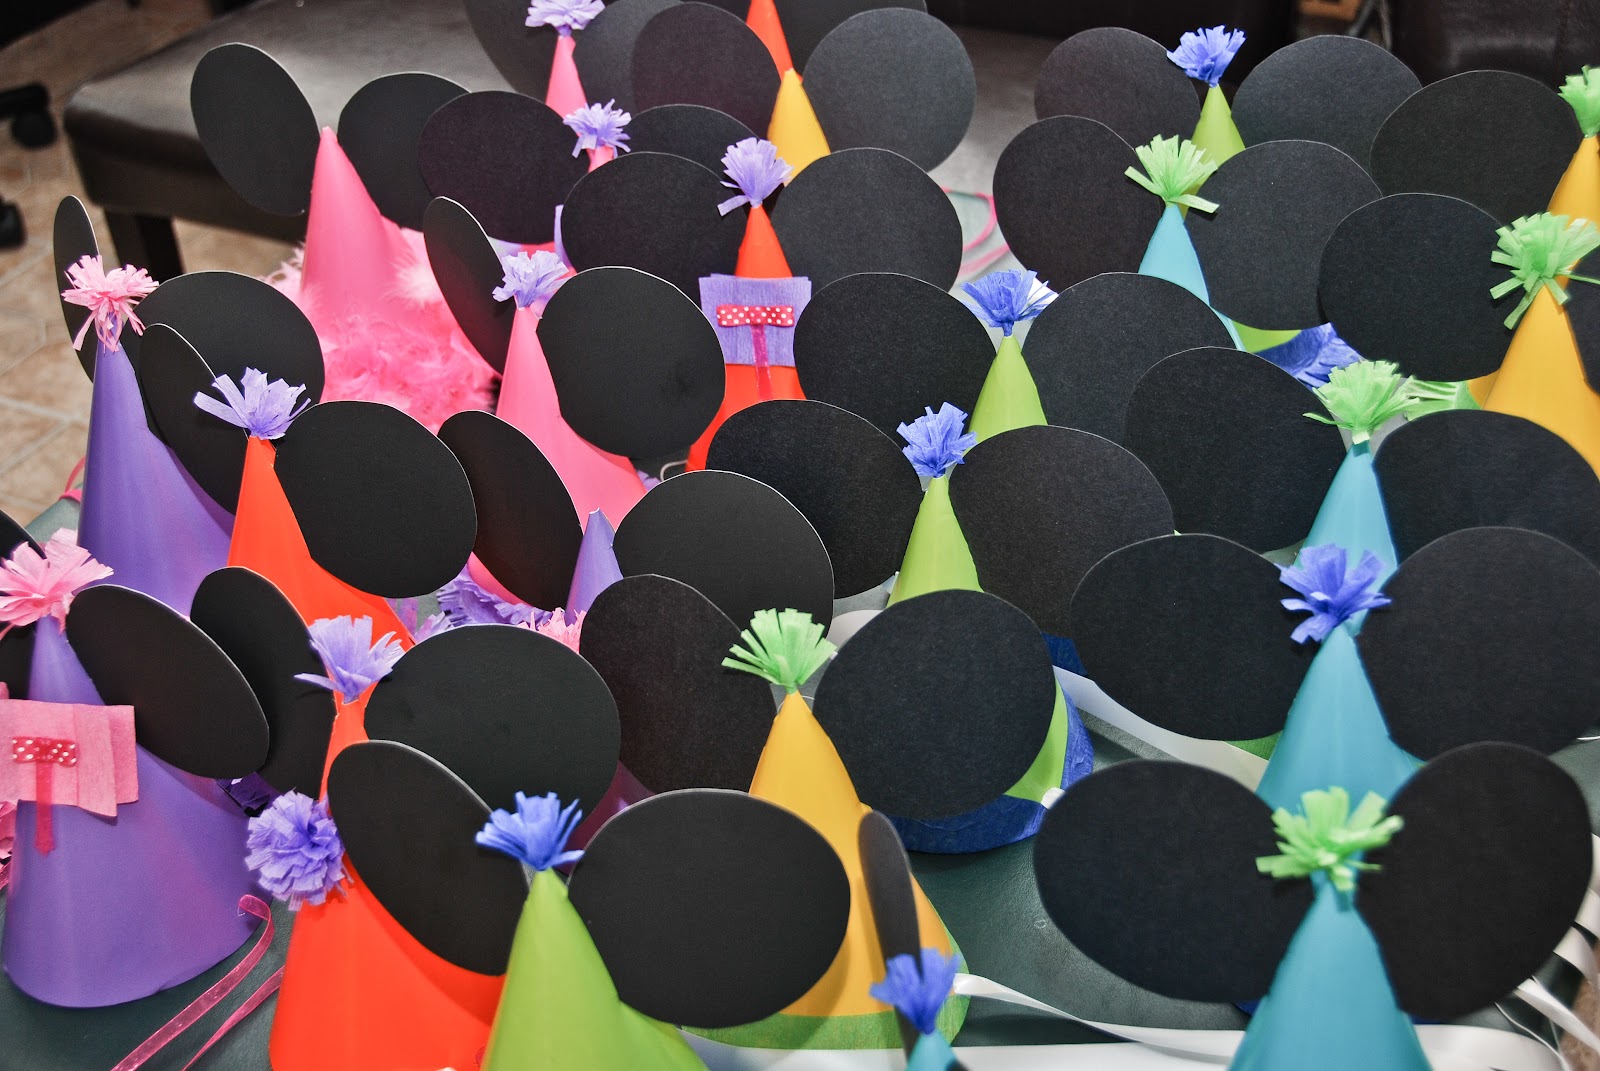
    Homemade Mickey/Minnie Party hats:

    Materials

    Do any designs you could think of to a plain party hat.
    Make the ears.


    And voila! You have your personalized Minnie/Mickey Party hats.
    Table Centerpieces and Utensils

    Fill the vases with sorted candies and chocolates.


    Materials that I used.

    Desserts: we had Oreo Pops, Caramel Popcorn, Fruits, Leche Flan, Brownies, Chocolate Fondue, Cotton Candy, Cupcakes from Jess (a cousin) and Cake from I Heart Cakery.

    Homemade Minnie Oreo Pops
    Homemade Caramel Popcorn


    Donut holes, Homemade M&Ms Brownies and Triple Chocolate Brownies.


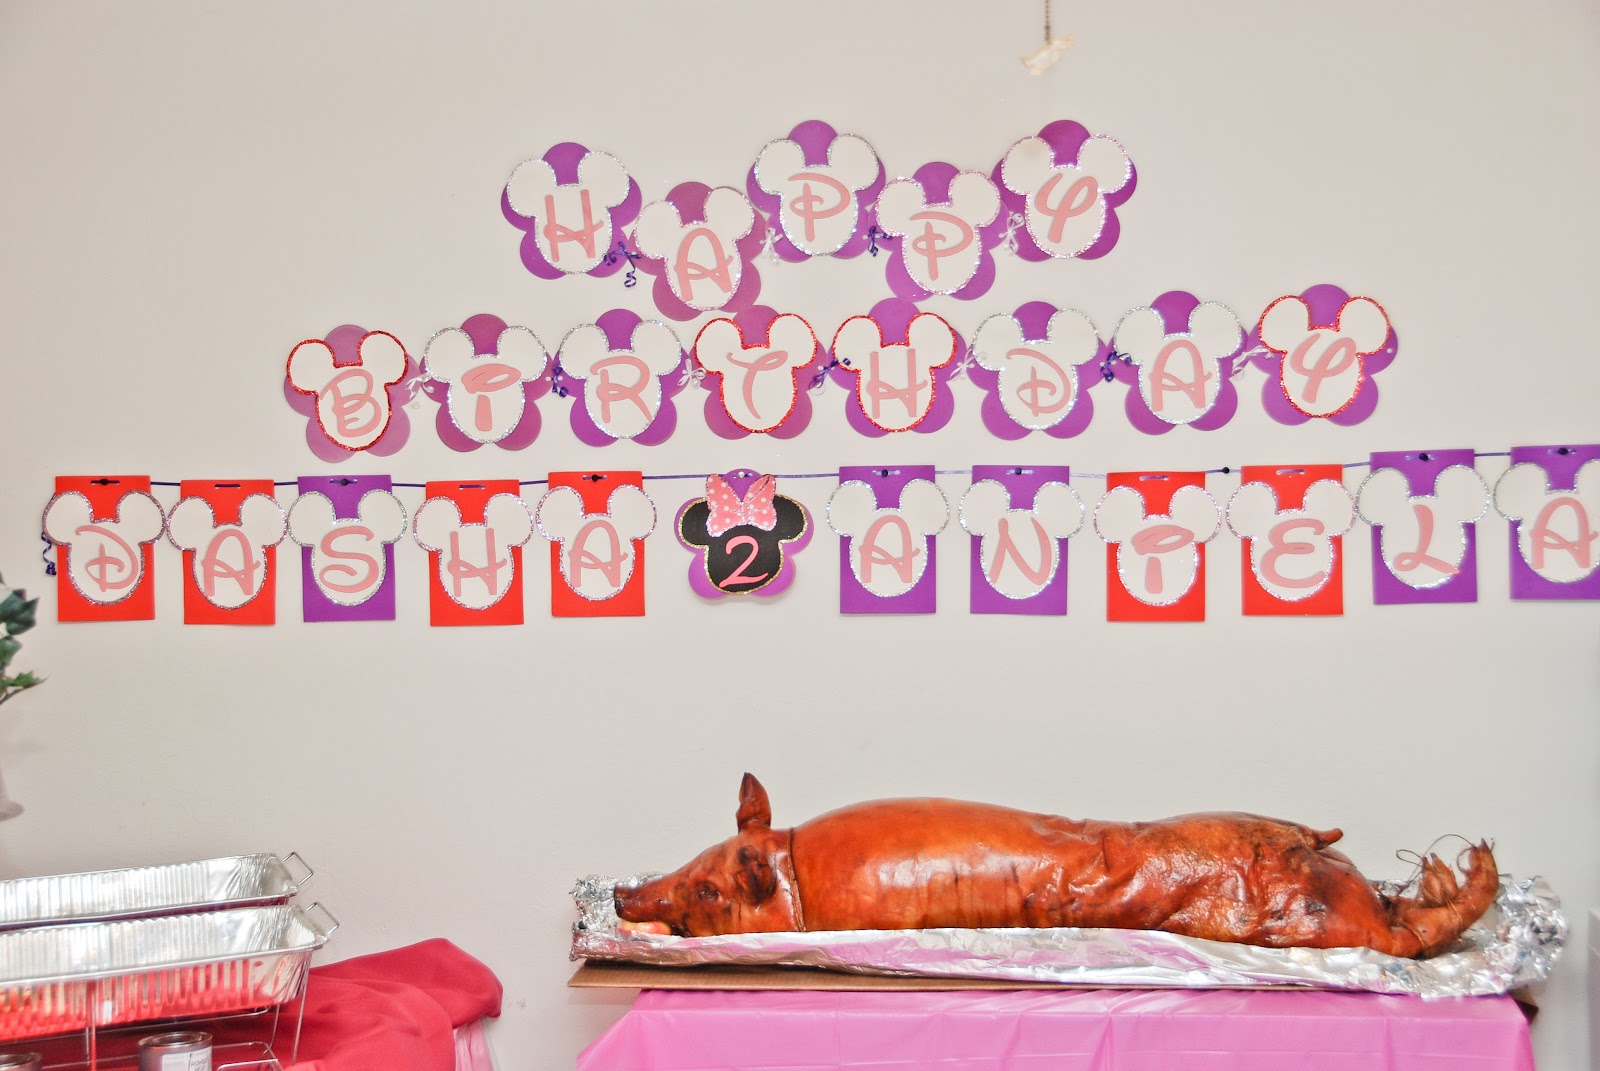
    Banner
    Another homemade Minnie Mouse Happy Birthday Banner (excuse the pig!)
    Loot bags


    Food catered by Kalesa and Lechon (roasted pig) from Pinoy Lechon BBQ and Grill


    Entertainment from Carlos Birthday Party Characters and jump house from Bay Area Jump


    Giant Pinyata and Gigantic Balloon


    The Celebrant


    That's it and thank you again for reading.


    All photos by Diorelle Galang-Agudo and Paperplane Media


    Related Posts Plugin for WordPress, Blogger...